Lithium-Ion Polymer Pouch Cell Production Process: 4 Stages and 16 Key Steps
Learn how lithium-ion polymer pouch cells are made, from slurry mixing and electrode coating to formation, testing, and final packaging.
August 27, 2026Green Battery TomAbout 10 min read
Green Battery Insights
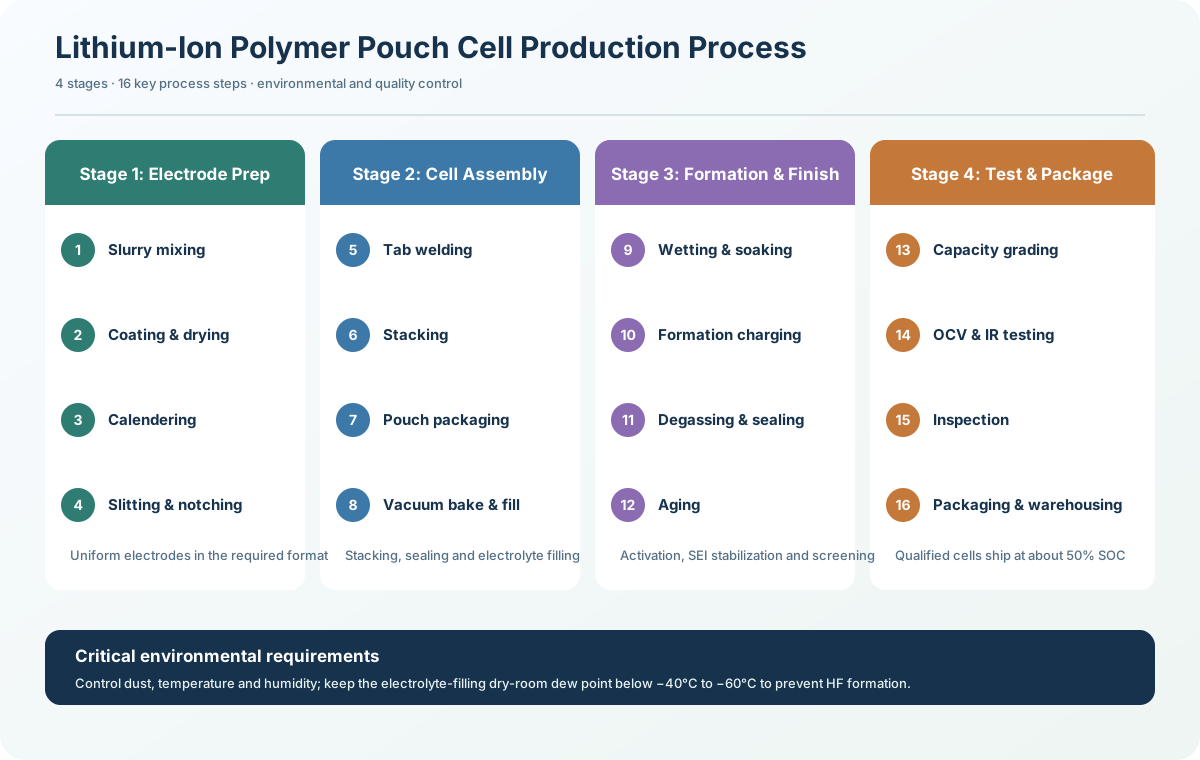
Lithium-ion polymer pouch cells are manufactured through four tightly controlled stages and 16 key process steps. Each stage affects the cell's electrochemical performance, safety, consistency, and suitability for the final product.
Unlike cylindrical or prismatic cells, pouch cells use aluminum-laminated film instead of a rigid metal case. This makes them lightweight and flexible in shape and size, which is why they are widely used in smartphones, wearables, drones, and other compact electronic products.
Stage 1: Electrode Preparation
Electrode preparation is the foundation of the production process. The formulation, uniformity, and physical structure of the electrodes directly influence the cell's capacity, resistance, energy density, cycle life, and safety.
1. Slurry Mixing
The positive electrode active material—such as lithium cobalt oxide (LiCoO₂), ternary NMC, or lithium iron phosphate (LFP)—is blended with a conductive agent, binder, and solvent. The negative electrode typically uses graphite or silicon-carbon material with SBR/CMC binder and deionized water. Mixing must produce a highly uniform and stable slurry so that every part of the coated electrode behaves consistently.
2. Coating and Drying
A precision slot-die coater applies the positive slurry to aluminum foil and the negative slurry to copper foil. The coated foils pass through a long drying oven that removes the solvent and produces large rolls of electrode film.
3. Calendering
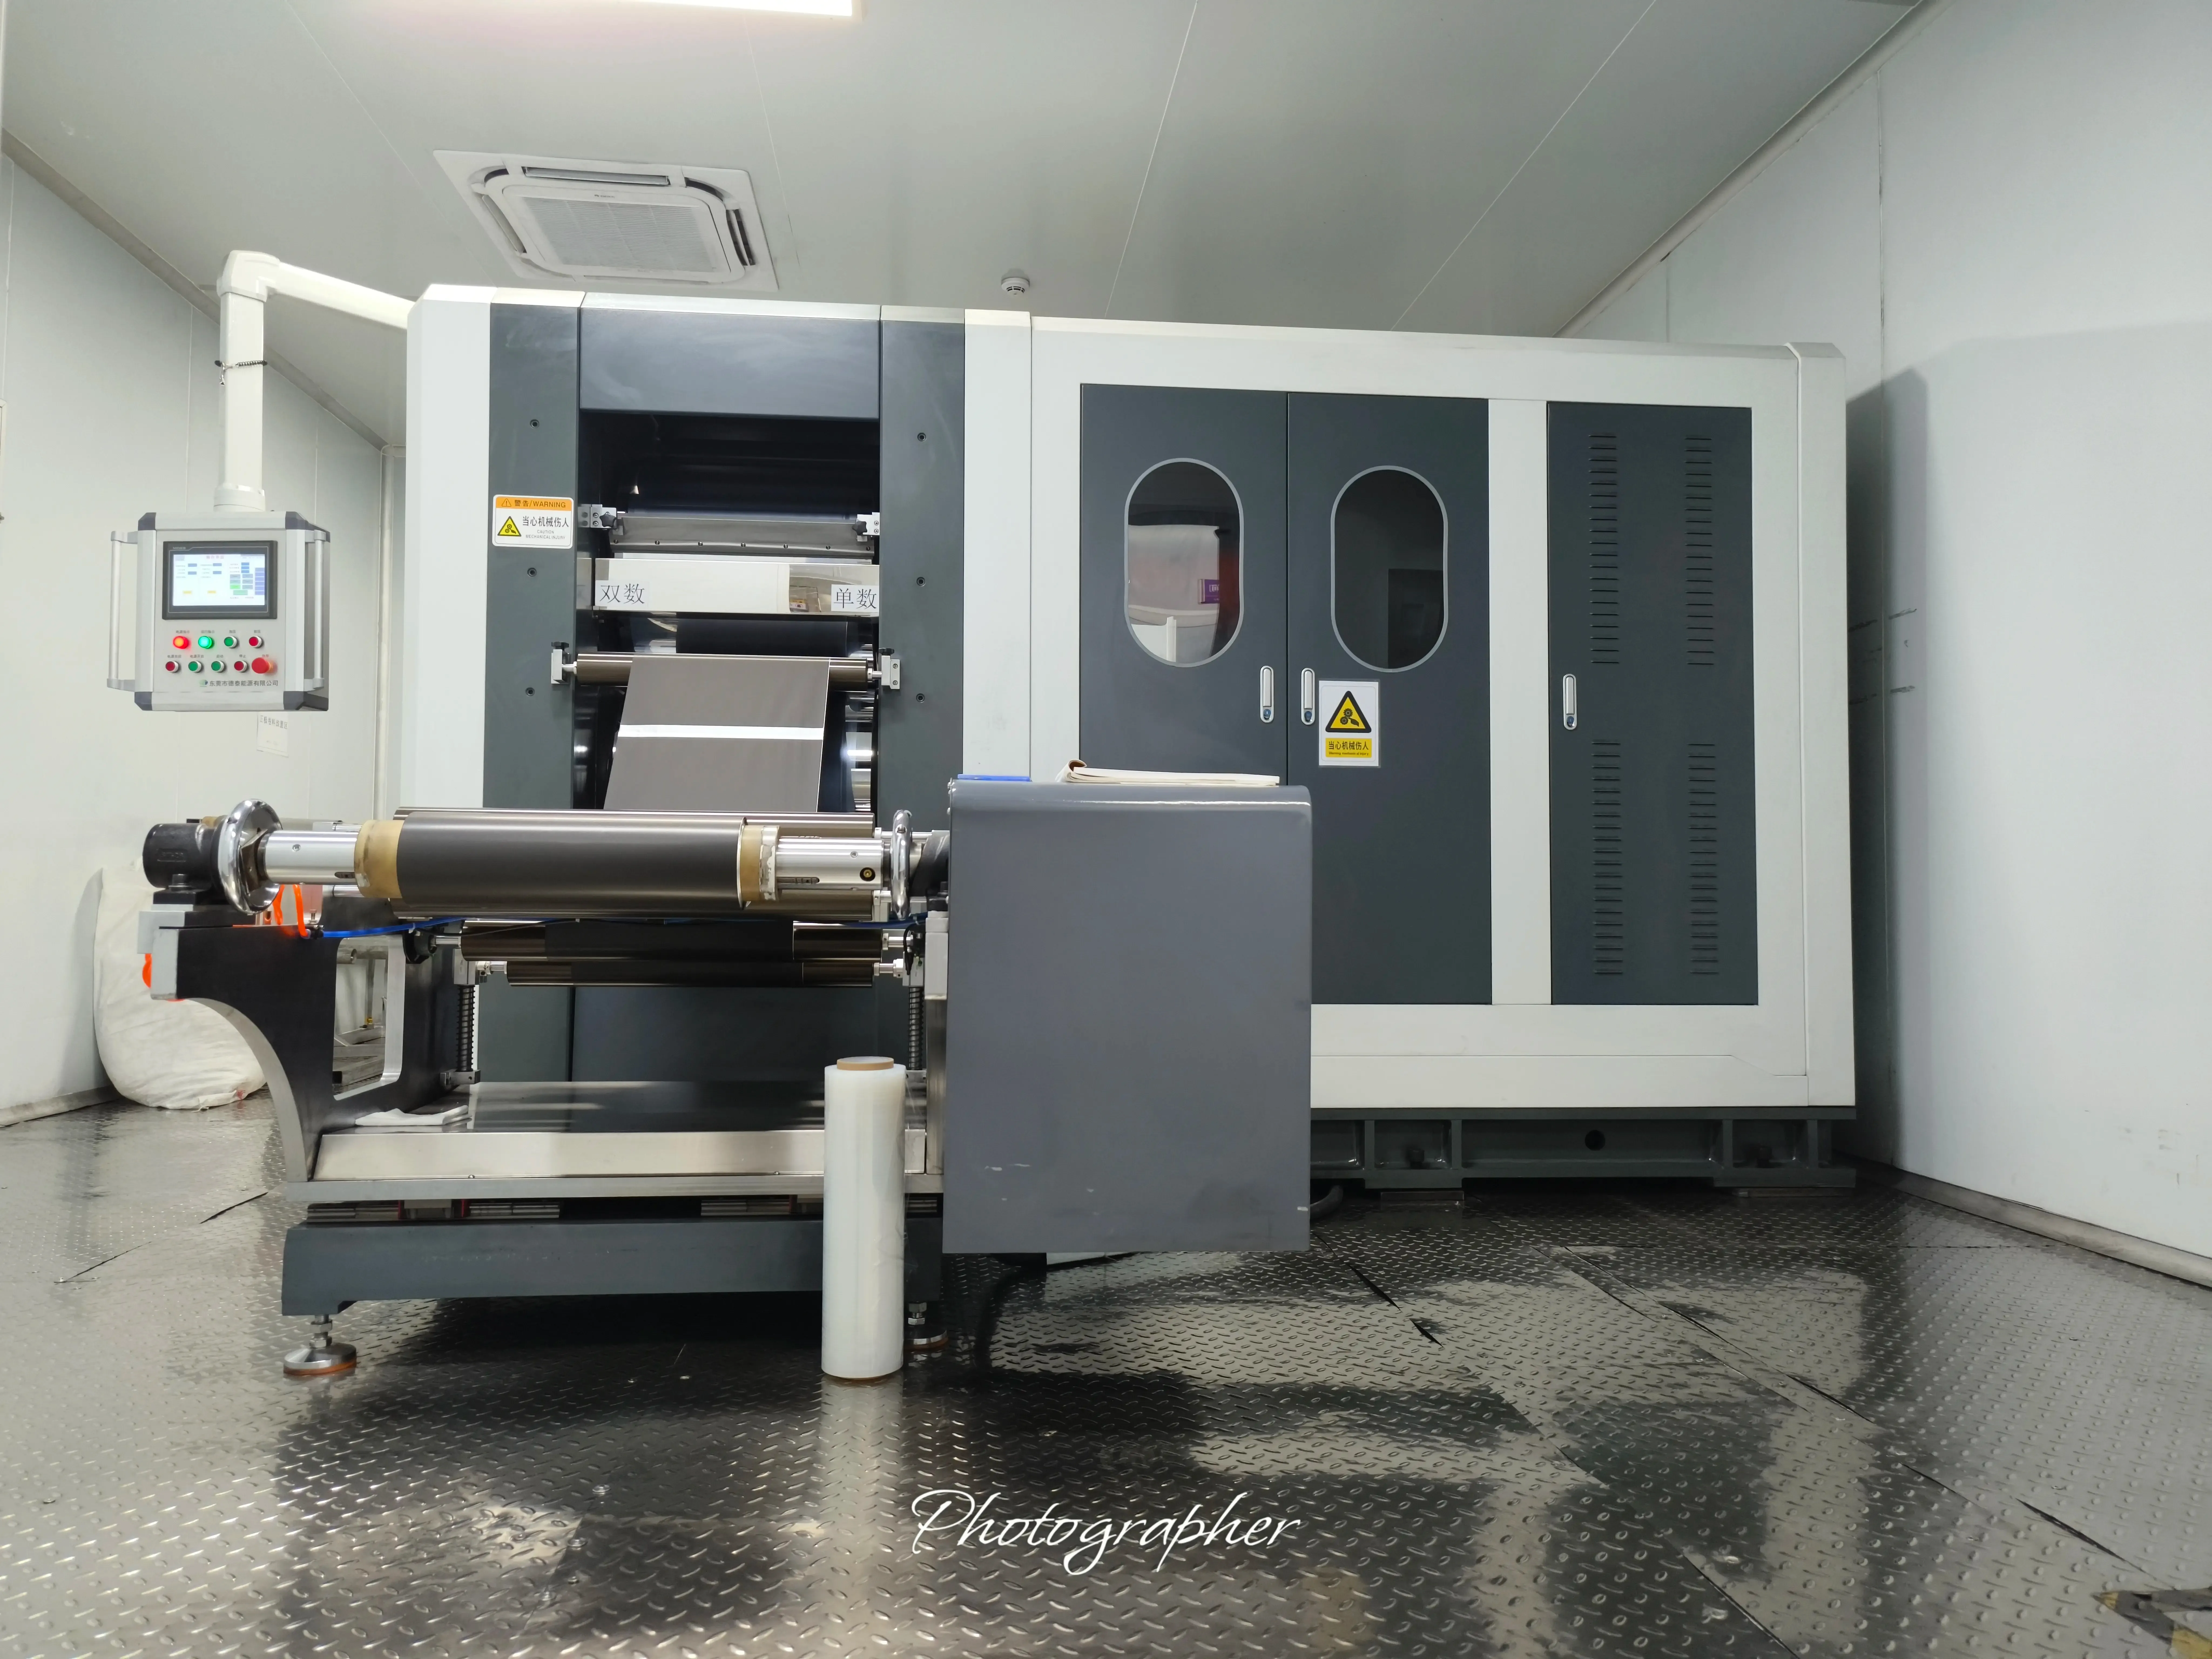
The dried electrodes are compressed between high-pressure rollers. This calendering step reduces thickness, increases electrode density, improves energy density, and strengthens adhesion between the active material and the current collector.
4. Slitting and Notching
The wide electrode rolls are slit to the required width. Notching then removes material around the tab positions, producing electrodes with the dimensions and tab geometry required by the cell design.
Stage 2: Cell Assembly
Cell assembly combines the prepared electrodes, separator, pouch film, and electrolyte into a sealed cell structure. Clean handling and accurate alignment are essential at this stage.
5. Tab Welding
Ultrasonic welding attaches the metal tabs to their respective current collector foils. Aluminum is commonly used for the positive tab, while nickel or nickel-plated copper is used for the negative tab. The welded joints are checked for quality and short circuits.
6. Stacking
Pouch cells generally use stacking rather than winding. Separator, positive electrode, separator, and negative electrode layers are alternated to form the cell stack. The porous PP/PE separator prevents direct contact between the electrodes while allowing lithium ions to pass through.
7. Pouch Packaging
Aluminum-laminated film, typically a nylon/Al/PP three-layer structure, is deep-drawn to create a pocket. The stacked cell is inserted into the pocket, and the top and side edges are heat-sealed. The electrolyte filling port remains open for the next process.
8. Vacuum Baking and Electrolyte Filling
Semi-finished cells are vacuum-baked at elevated temperature to remove residual moisture, which is critical for battery safety. In a dry room with a dew point below −40°C, electrolyte containing LiPF₆ lithium salt in organic solvents is injected, followed by vacuum pre-sealing.
Stage 3: Formation and Finishing
Formation activates the cell's electrochemical system and stabilizes its internal interfaces. The steps in this stage have a major influence on cycle life, self-discharge, gas generation, and long-term reliability.
9. Wetting and Soaking
After electrolyte filling, the cells rest for several hours or days. This allows the electrolyte to fully penetrate the electrode pores. Depending on the design, high-temperature soaking may be used to improve wetting and process consistency.
10. Formation Charging
The first charge is performed at a low current, commonly around C/20 to C/10. This activates the electrode materials and forms the solid electrolyte interphase (SEI) on the negative electrode. The SEI is essential for cycle life and safety. Gas can be generated during formation, causing the pouch to bulge temporarily.
11. Degassing and Secondary Sealing
The gas pocket is pierced inside a vacuum chamber so that formation gases and excess electrolyte can be removed. The opening is immediately heat-sealed to restore airtightness, and the gas pocket is trimmed away. The cell is then essentially complete.
12. Aging
Cells are stored at room temperature or at an elevated temperature of approximately 45°C for several days. Aging allows the SEI to stabilize and helps screen for self-discharge, micro-shorts, and other early performance abnormalities.
Stage 4: Testing and Packaging
The final stage verifies capacity, electrical characteristics, internal alignment, appearance, and sealing quality before shipment.
13. Capacity Grading
Each cell undergoes charge-discharge cycling, such as a 1C/1C test, to measure actual capacity. Cells are then sorted into capacity grades so that cells with compatible performance can be grouped together.
14. OCV and IR Testing
Open-circuit voltage (OCV) and AC internal resistance (ACIR) are measured to identify cells with abnormal voltage or resistance. These measurements help maintain consistency and detect potential defects before assembly or shipment.
15. Inspection
X-ray inspection checks the alignment of the internal electrode stack. Automated vision systems and manual inspection then assess appearance, dimensions, tab position, and seal quality.
16. Packaging and Warehousing
Qualified cells are charged to approximately 50% state of charge (SOC), vacuum-packed with anti-static materials and desiccant, boxed, and placed into the warehouse for shipment.
Critical Environmental Requirements
The entire process requires strict control of dust, temperature, and humidity. Electrolyte filling is especially sensitive: the dry room generally needs a dew point below −40°C to −60°C. Moisture can react with LiPF₆ electrolyte salt and generate hydrofluoric acid (HF), which can seriously reduce battery performance and compromise safety.
Why Pouch Cells Are Widely Used
Pouch cells replace a rigid metal casing with aluminum-laminated film. The result is a lightweight cell with flexible form-factor options, high energy density, and good resistance to metallic short circuits under mechanical damage. These characteristics make pouch cells a strong fit for smartphones, wearables, drones, and other products that require a customized battery shape.
Conclusion
From slurry mixing to final warehousing, lithium-ion polymer pouch cell manufacturing is a connected chain of material, mechanical, electrochemical, environmental, and quality-control operations. Reliable custom batteries depend not only on the selected chemistry, but also on precise process control and verification at every stage.
Procurement & Engineering Solutions
Related Battery Categories & Manufacturing Capacities
Looking to evaluate specifications or request custom engineering samples? Explore our verified product lines below: